


Technical Information Windshield repair set
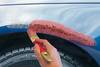
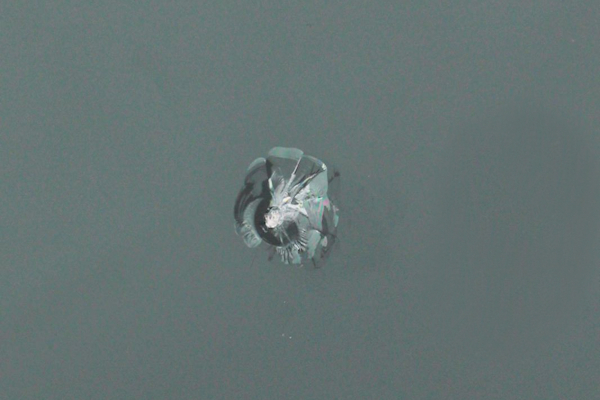
Bullseye, half bullseye or star breakage – the names for windshield damage may seem comical but the consequences are not a laughing matter: TÜV don’t find them at all amusing and the complete replacement of the windshield without being able to fall back on partial or fully comprehensive insurance is expensive. The presto Windshield Repair Kit is the reliable and cost-effective alternative to the expense of replacing a windshield. The kit includes all special tools and a highly effective, transparent resin enabling you to repair damage to automotive glass like a professional.
Quality and properties
- Easy glass repair for every car glass!
- Fast and easy application
- Eliminates minor damage such as stone chips
- Stabilizes and seals the damaged area
- Prevents stone chips and cracks from spreading further in the windscreen
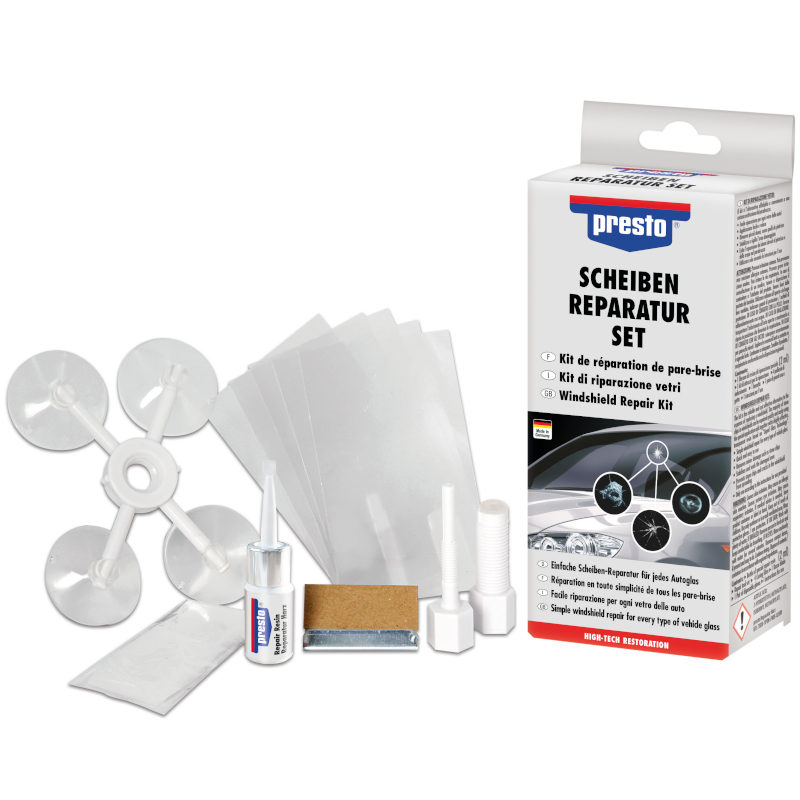
- Set contains:
1 bottle of special repair resin
1 repair tool set
4 curing foils
1 razor blade
1 pair of disposable gloves
1 instruction manual
Physical and chemical data
- Chemical base:: Mixture of the substances listed in the safety data sheet with harmless additions
- Consistency: liquid
- Colour: colourless
- Odour: characteristic
- Flashpoint: 97°C
- Storage stability:
36 months in the closed original package if cool and dry storage provided (=5°-25°C, relative air humidity of max. 60%). Protect from direct sunlight, frost and humidity. - Size: Repair resin 2ml plastic bottle
Environment and labelling
Environmentally compatible: European Aerosols is committed to apply formulations without restricted or critical ingredients and to achieve best possible performance. The caps and packagings are made of recyclable material.
Disposal: Please mind the residue inside the containers. Completely emptied containers can be used for recycling. If cans are not emptied, they should be disposed off as "special refuse".
Only for DE: In order to ensure a high reuse and recycling rate, the legislator requires, in accordance with §15 - VerpackG, Paragraph 1, the return of transport, sales or outer packaging, alternatively, however, deviating agreements can also be made.
Labelling: All products of European Aerosols comply with the current status of their labelling regulations. Classification and distinction takes place by the presently legal form of the Globally Harmonized System of Classification and Labelling of Chemicals (GHS) or rather by CLP 1272/2008/EG regulations. Our safety data sheets comply with the current form of REACH 1907/2006/EG, article 31 und appendix II,
Application
- Carefully remove any excess and loose pieces of glass with the razor blade. Do not increase the damage unnecessarily. Attach the applicator base to the windshield using the suction cups. Make sure that the center ring of the applicator base is positioned centrally over the damaged area. The suction cups must not be on fine cracks.
- Screw the repair resin container into the center ring of the applicator base. Tighten the repair resin container clockwise. Make sure that the rubber seal on the bottom of the repair resin container is fully against the windshield, but not with too much pressure. Excessive pressure affects the flow of the repair resin and the effectiveness of the repair.
- Cut only the sealed tip of the thin end of the repair resin bottle. Depending on the extent of the damage, add 3 to 6 drops of the repair resin to the repair resin container. If the resin comes out of the bottom of the repair resin container, gently turn it clockwise just enough to prevent it from leaking.
- Screw the print driver clockwise into the repair resin container to push the resin into the damaged area. Tighten until the pressure driver is almost completely screwed in. From the inside of the cart, check that the opening of the rubber seal at the bottom of the repair resin container is wide open. Allow time for the repair resin to fully penetrate the crack / chipping (4 to 6 minutes, depending on the extent of the damage). If the repair resin has not reached all the damaged areas, you can lightly (!) Heat the inside of the windshield with a hair dryer.
- Unscrew and remove the print driver from the repair resin container to release the air trapped in the chamber. If necessary, add a few drops of repair resin to the container. Reinsert and screw the print driver back in place to displace the air left in the damage. To determine if the repair resin has been absorbed into the damage, look at the glass from an angle of approximately 45 °. Make sure that no air bubbles remain in the damage. In the event of flaking and stone chips, inspect the glass directly behind the damaged area from inside the vehicle. Areas that have not been repaired appear as dark (green or black) areas. If damage is still visible, repeat steps 4 and 5 until the desired result is achieved. Make sure that there is still enough repair resin in the repair resin container.
- After the air has completely escaped, turn the repair resin container and the print driver together half a turn to the left (counterclockwise). Remove the entire device by lifting the small tabs on the suction cups of the applicator base. Use a clean paper towel to gently wipe excess repair resin from the repair resin container to prevent it from running down the windshield. Put a drop of the repair resin on the areas where damage is still visible and cover it with a hardening film. When applying the curing film to the repaired area, no pressure is required; just place the curing film carefully on the glass, positioning the curing film so that it lies as centrally as possible on the damaged area.
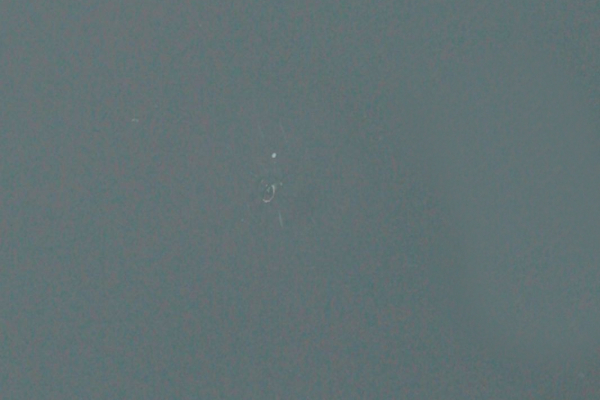
- When the entire process is complete, place the car (the windshield) directly in the sun to harden the repair resin or use a UV lamp (wavelength: 300 - 400 nm, not included). Let the repair resin harden completely (approx. 10-15 minutes) and then remove the hardening foil. The repair resin must be completely dry and hardened. Only then remove the excess hardened resin with the razor blade until the hardened resin dissolves in white flakes. For best results, hold the razor blade at an angle of 90° to the windshield when pulling it off and guide the blade exactly parallel to the windshield to avoid scratches in the disc through the corners of the blade. If damage is still visible, apply a small drop of the repair resin directly to the damaged area. Cover the area with a curing film as described in step 6. After curing (approx. 10-15 minutes) carefully remove the excess hardened repair resin from all areas, with the exception of the treated area, with the razor blade. Possibly. clean the pane with a glass cleaner and microfiber cloth (not included). A small, matte dot usually remains visible. This is not a defect, but due to technical reasons. The vehicle is now ready for use again. The curing time of the repair resin can vary depending on the outside temperature and the intensity of the sunlight.
Advices
For best results, the repair should be done promptly after the damage occurs. Clean the glass before use. We recommend use at temperatures> 12 ° C and sunshine. The windshield should be protected from direct sunlight during the entire repair process. To ensure the stability of the windshield, repairs may only be carried out if the flaking is not greater than 2.5 cm in diameter. The damage must not be less than 10 cm from the outer edge of the windshield. The damaged area must not be in the driver's field of vision. This is about 30 cm wide and is located just above the center of the steering wheel. The glass may only be damaged on the outermost layer. A maximum of three damages per windshield may be repaired. The manufacturer assumes no liability for damage or consequential damage caused by incorrect use of the product.
Disclaimer of liability
This application-technological information is given to the best of our knowledge. The notes mentioned herein are, however, non-binding and do not exempt you from own tests to see whether the products supplied by us are suitable for your special application. The use and processing is beyond our control and therefore exclusively in the responsibility of the user. European Aerosols is let off the liability, unless the liability-based incident is caused by a fault incurred to European Aerosols.
As of: April 16, 2020
This release replaces all eventually earlier issued versions.